My New Nano Tank
Yesterday Dank was an hour late because he went fish tank accessories shopping right? Well here's what he bought which resulted in him being late, together with some other stuff that he originally had in his room...
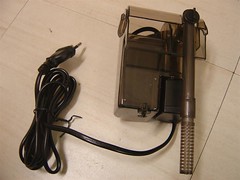
Left photo: Mini hang-on filter to remove dirt, bought yesterday
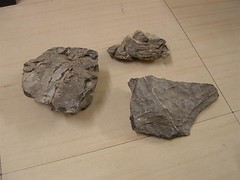
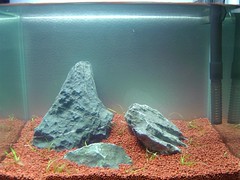
Right photo: 3 pieces of rocks for the aquascape, bought yesterday
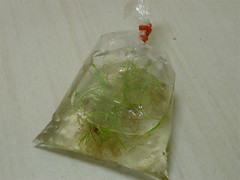
Left photo: Foreground aquatic plant, bought yesterday
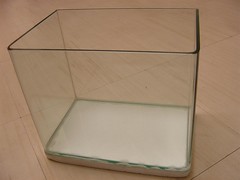
Right photo: Mini Curved-glass Fish Tank
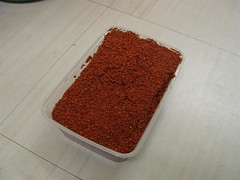
Left photo: Reddish-brown Gravel used as the base
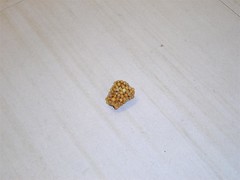
Right photo: Root Monster Fertiliser for healthy aquatic plant growth
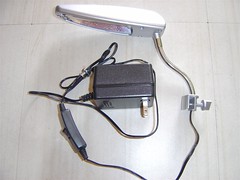
Left photo: 7W Light for plant growth and visual enhancement
Are all these stuff necessary? They look so plain and boring...
Well you're absolutely correct if you look at them individually. However if you put them together beautifully and allow them to co-exist, the result is an aesthetically pleasing fish tank; the end feeling is satisfying.
Dank spent an hour cleaning the stuff last night in preparation for today's setting up, and spent an hour today putting them all together. Following is his experience to share with you...
My process of creating a Nano Tank
Step 1) Clean the stuff
Wash the fish tank, gravel, rocks, filter to remove dirt and stuff that you don't want in a fish tank. Scrub with an old toothbrush if you have to, but do NOT use soap (unwashed soap residue will kill the fish in the future).
Step 2) Gravel
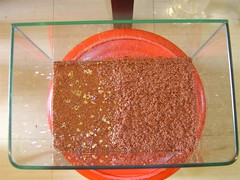
Cover the bottom of the tank with a small layer of gravel, then sprinkle two pieces of crushed Root Monster Fertiliser on top of this layer. The Root Monster is crushed because inserting the whole piece into such a small tank is not feasible (it will protrude from the gravel because the height is taller than the depth of the gravel) and crushing/spreading is more suitable. Then finish up this setp by pouring in the rest of the gravel required to cover the fertiliser, to enable stable positioning of the rocks, and to allow necessary substrate depth for the rooting of the plants.
Step 3) Insert the Rocks
Place them gently taking care not to scratch the glass walls. Arrange them into your preferred artistic position.
Step 4) Half-fill with Water
Gently and deliberately add water to the tank, taking care not to splash and disturb the gravel which will cause the fertiliser to escape. Make use of the rocks to allow the water to trickle down. Step 5) Plant the plants
Using a pair of tweezers push the root bud deep, then half pull upwards to allow the roots to face downwards where they will draw their nutrients from the fertiliser previously inserted. Insert each plantlet one at a time, spacing them 2-3cm apart.
Step 6) Full-fill with Water
Similar to step 4, fill the tank with water to 1-2cm below overflowing.
Step 7) Add the Filter and Lights
Hang on the filter in a suitable position ensuring the outlet flow allows for maximum water circulation around the tank. Add the light ensuring the places which require light (position of plants) get adequate illumination.
Step 8) Placement of Completed Fish Tank
Place your fish tank in a nice place where you will be able to appreciate and enjoy its beauty...
Why no Fish?
Do not add fish immediately after setting up the fish tank because the water is not yet cycled. Cycling a fish tank means to allow beneficial bacteria (bb) to grow and the water to be aged. A stable level of beneficial bacteria is required because they will remove toxic nitrates and nitrates from the water. With fish in the tank but without the bb you will have to change the water every 2-3 days in order to maintain tolerable levels of poisonous nitrites and nitrates, and the water changes will heavily stress the fishes (fluctuation in water parameters with the changing of water). Fish and shrimps should normally be added after 2 weeks.
Dank hopes this entry has given you an educating insight into a simple planted tank. For more information please feel free to contact him. =)
Dank should mention he loves planted aquaria, a lot...
Left photo: Mini hang-on filter to remove dirt, bought yesterday
Right photo: 3 pieces of rocks for the aquascape, bought yesterday


Left photo: Foreground aquatic plant, bought yesterday
Right photo: Mini Curved-glass Fish Tank


Left photo: Reddish-brown Gravel used as the base
Right photo: Root Monster Fertiliser for healthy aquatic plant growth


Left photo: 7W Light for plant growth and visual enhancement

Are all these stuff necessary? They look so plain and boring...
Well you're absolutely correct if you look at them individually. However if you put them together beautifully and allow them to co-exist, the result is an aesthetically pleasing fish tank; the end feeling is satisfying.
Dank spent an hour cleaning the stuff last night in preparation for today's setting up, and spent an hour today putting them all together. Following is his experience to share with you...
My process of creating a Nano Tank
Step 1) Clean the stuff
Wash the fish tank, gravel, rocks, filter to remove dirt and stuff that you don't want in a fish tank. Scrub with an old toothbrush if you have to, but do NOT use soap (unwashed soap residue will kill the fish in the future).
Step 2) Gravel
Cover the bottom of the tank with a small layer of gravel, then sprinkle two pieces of crushed Root Monster Fertiliser on top of this layer. The Root Monster is crushed because inserting the whole piece into such a small tank is not feasible (it will protrude from the gravel because the height is taller than the depth of the gravel) and crushing/spreading is more suitable. Then finish up this setp by pouring in the rest of the gravel required to cover the fertiliser, to enable stable positioning of the rocks, and to allow necessary substrate depth for the rooting of the plants.

Step 3) Insert the Rocks
Place them gently taking care not to scratch the glass walls. Arrange them into your preferred artistic position.
Step 4) Half-fill with Water
Gently and deliberately add water to the tank, taking care not to splash and disturb the gravel which will cause the fertiliser to escape. Make use of the rocks to allow the water to trickle down. Step 5) Plant the plants
Using a pair of tweezers push the root bud deep, then half pull upwards to allow the roots to face downwards where they will draw their nutrients from the fertiliser previously inserted. Insert each plantlet one at a time, spacing them 2-3cm apart.
Step 6) Full-fill with Water
Similar to step 4, fill the tank with water to 1-2cm below overflowing.
Step 7) Add the Filter and Lights
Hang on the filter in a suitable position ensuring the outlet flow allows for maximum water circulation around the tank. Add the light ensuring the places which require light (position of plants) get adequate illumination.
Step 8) Placement of Completed Fish Tank
Place your fish tank in a nice place where you will be able to appreciate and enjoy its beauty...

Why no Fish?
Do not add fish immediately after setting up the fish tank because the water is not yet cycled. Cycling a fish tank means to allow beneficial bacteria (bb) to grow and the water to be aged. A stable level of beneficial bacteria is required because they will remove toxic nitrates and nitrates from the water. With fish in the tank but without the bb you will have to change the water every 2-3 days in order to maintain tolerable levels of poisonous nitrites and nitrates, and the water changes will heavily stress the fishes (fluctuation in water parameters with the changing of water). Fish and shrimps should normally be added after 2 weeks.
Dank hopes this entry has given you an educating insight into a simple planted tank. For more information please feel free to contact him. =)
Dank should mention he loves planted aquaria, a lot...



4 Comments:
Now that i've noted the painstaking effort in creating a tank, here's a big "THANK YOU" in advance. =)
whimsical: Does this mean that Dank is obliged to do it, and say "welcome" in advance too? =P
..... So June wasn't a deal? =(
Orh...
deal, deal.
Post a Comment
<< Home